How to Switch On Spam Filtering in WordPress Hosting
1. Login into your WordPress control panel via our client area portal.
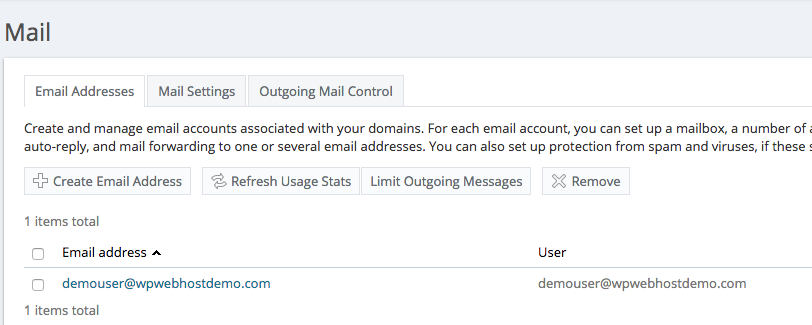
2. Select Mail > Select and click on the email account that you wish to setup the spam filtering.

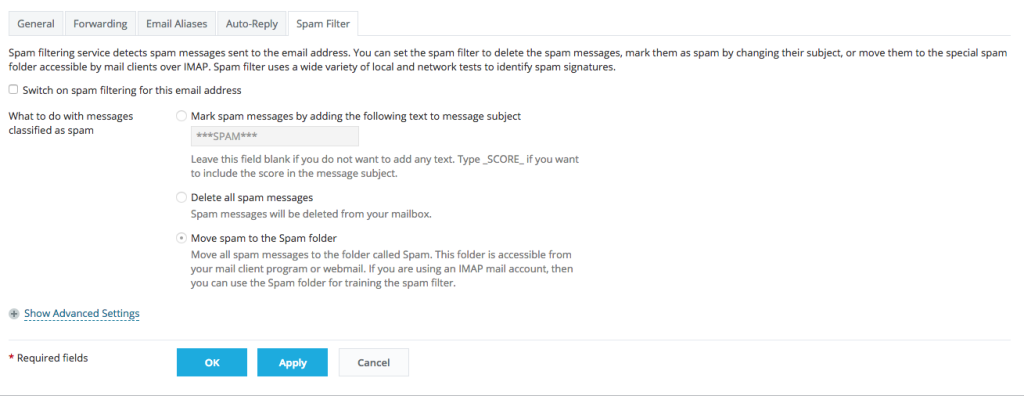
3. Click “Spam Filter” tab.
4. Tick on “Switch on spam filtering for this email address”.

5. Decide the action that you wish to the mail server to execute if the emails are identified as spam. The recommended option is to set it to “Move spam to the spam folder” that allows you to scan through to avoid any false positive emails which may be wrongly identified as spam. Setup a routine – probably check your Spam folder once a day and clear off the mails inside if it’s not the emails you wish to get.
6. Click OK to apply the changes.

